Here you will find an ever increasing range of articles covering technique and tips on using our cameras and lenses.
How does macro focus stacking with flash actually work and why does it make sense to use a flash at all?
What features should an optimal flash for macro photography have?
With this little guide you will be ready to use Focus Bracketing (Focus BKT) and Focus Stacking with flash with your OM SYSTEM camera and take macro photos with increased depth of field and impressive details - even of the smallest insects.
BRIEFLY EXPLAINED: WHAT IS FOCUS STACKING?
In macro photography, especially at magnifications of 1:1 or above, the plane of focus is very often razor thin.
So in order to get our subject, or a specific area, such as the head of a beetle, completely in focus, we actually need several photos.
To do this, we take a series and shift the plane of focus minimally in each case - we scan our motif, so to speak.
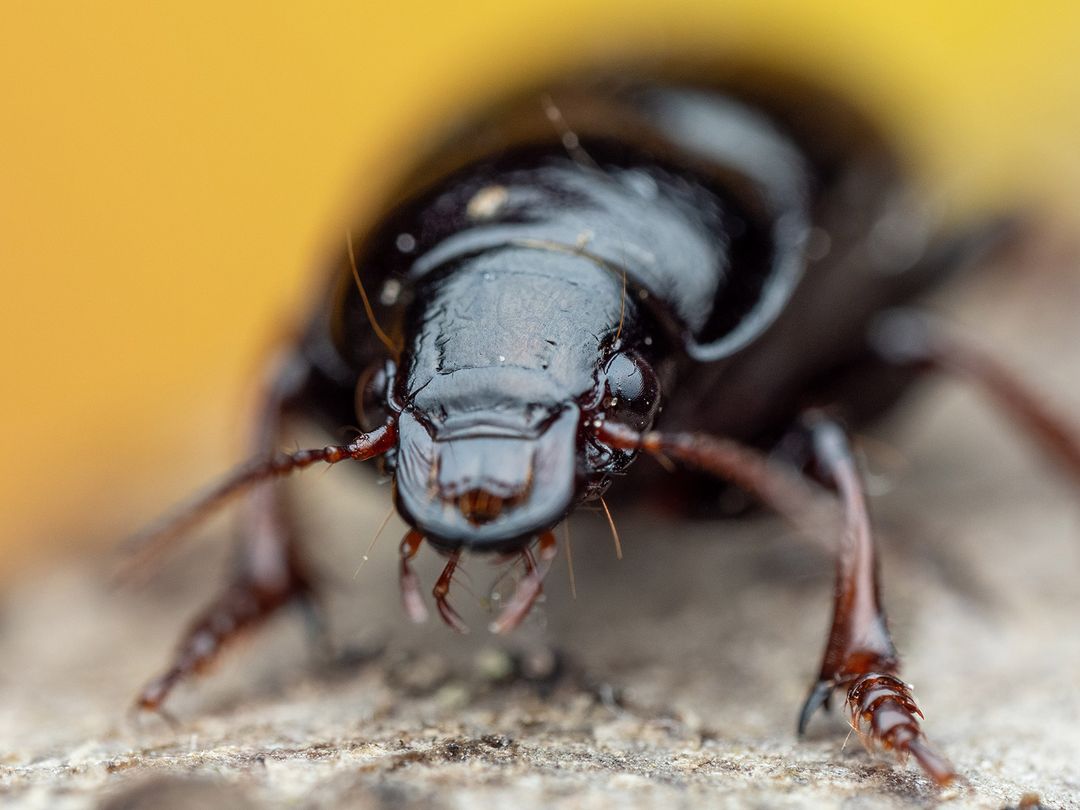
Single image of a focus stack with a very thin plane of focus on the beetle's eyes.
We can do this manually, or simply let our camera do it using the Focus Bracketing function.
Focus bracketing provides the raw material for our focus stack.

Now, with the help of software, the series of individual shots can be merged into a final photo (the so-called focus stack) with increased depth of field.
Or we let the camera take over this step as well (keyword computational photography): the function Focus Stacking takes both the so-called Focus Bracket and then also converts these images to our final image.
Practical!
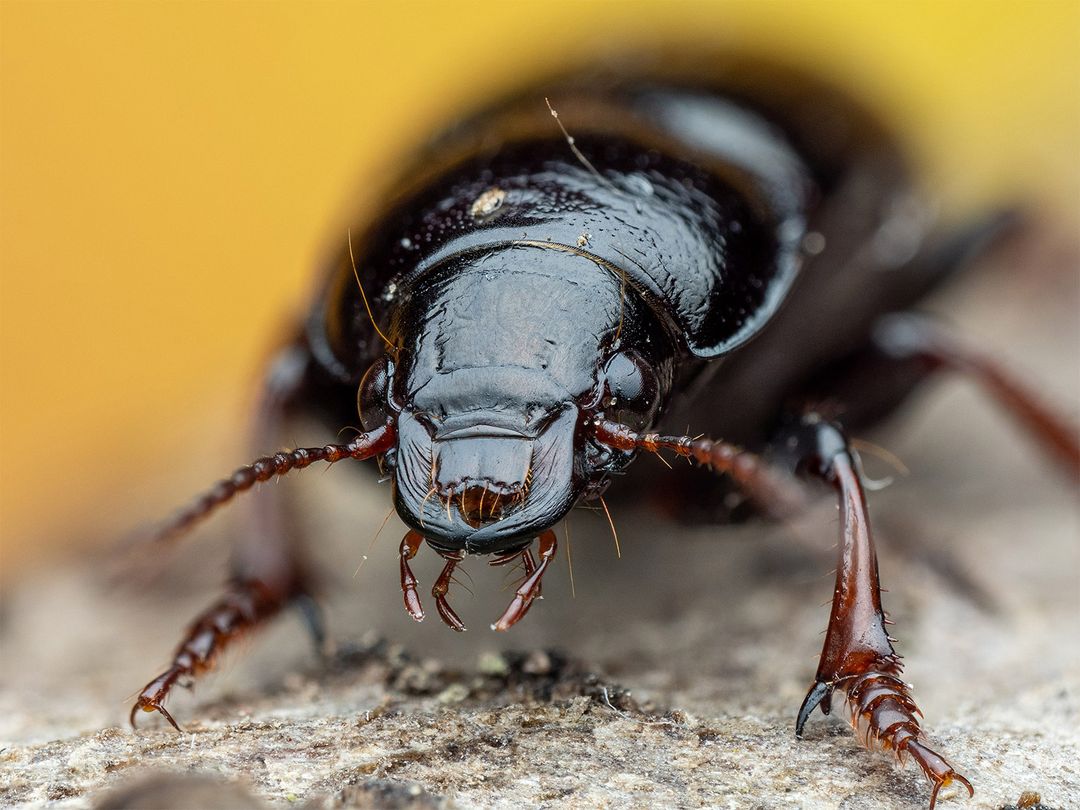
Final focus stack of 20 images with a clearly enlarged focus area (compared to a single image).
FOCUS BRACKETING (E.G. OM SYSTEM OM-1)
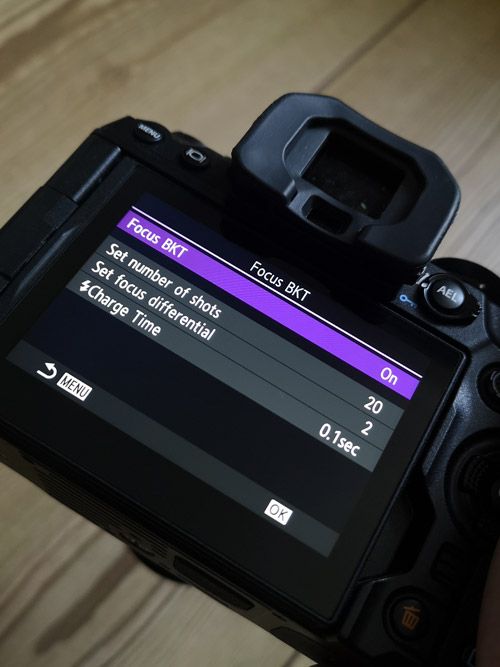
Maximum number of single photos in the series: 999
The focus BKT takes pictures in silent mode.
Note: The camera shifts the focus away from the sensor, starting from the intended focus point.
FOCUS STACKING (E.G. OM SYSTEM OM-1 AND OM-D E-M1 III):
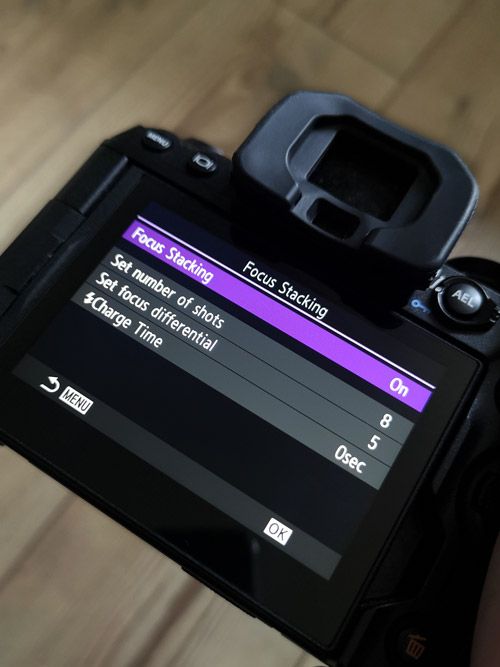
Maximum number of individual photos in the series: 15.
Both the individual photos and the final, stacked photo are saved.
Note: The camera takes approx. 1/3 of the photos in front of the focal point, i.e. towards the sensor, and then 2/3 in depth, away from the sensor.
By the way, it is not necessary to set the exact number of photos in advance - alternatively, you can also preset e.g. 200 photos for the focus series, but stop manually beforehand as soon as the desired end point is reached - by pressing the shutter button again.

WHY THE FLASH IS OUR BEST FRIEND IN MACRO PHOTOGRAPHY
The closer we get to our subject and the higher the magnification, the more light we need to expose our photo perfectly and to show the maximum sharpness and details.
If we want to photograph small creatures like insects or spiders, we usually need light from a low angle - the high sun might give us enough light, but it casts harsh shadows and only illuminates our subjects from above.
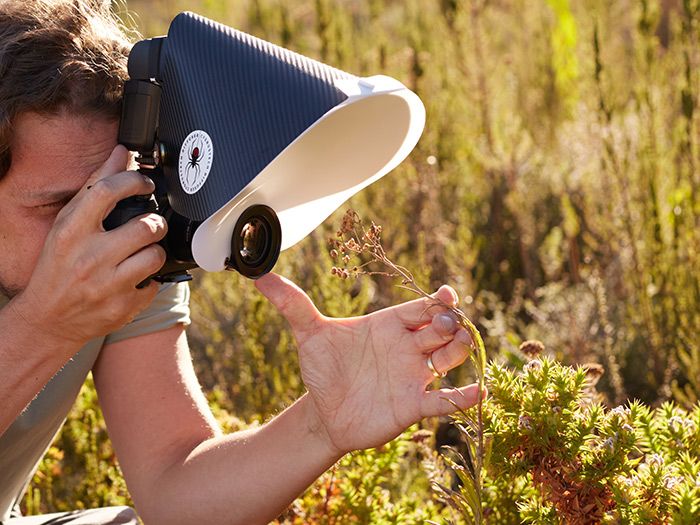
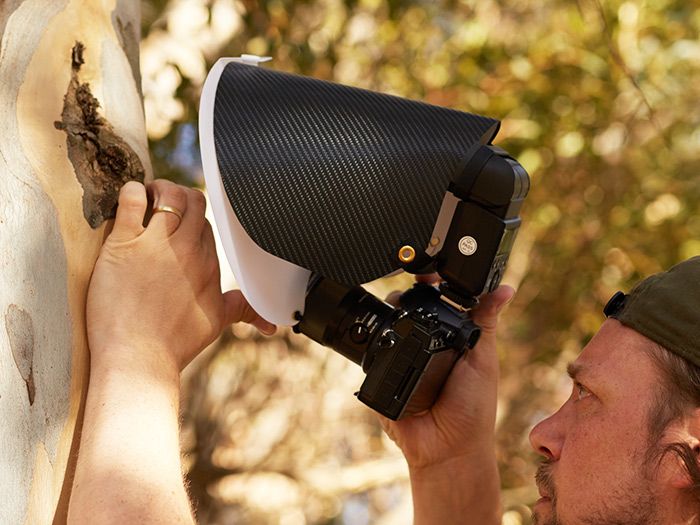
This is where a clip-on flash on the camera helps us.
In the best case, we also use a macro diffuser, a kind of small softbox, which reflects the light directly to the front of the lens (otherwise the flash would flash over our subject) and also softens our hard flash light, allowing for an even illumination of our subject.
Very similar to a portrait shoot with a softbox with human models - only in the mini version.
In addition, using a flash has other advantages: The burning time of the flash is so short that it virtually replaces the shutter speed of the camera and can freeze movements. This makes blurry and out-of-focus macro photos a thing of the past.
(This does not necessarily help us with focus stacking, because here we need a subject that is motionless, but it does help when photographing fast-moving insects, for example).
In backlit situations, a flash helps to brighten up the foreground or our subject.
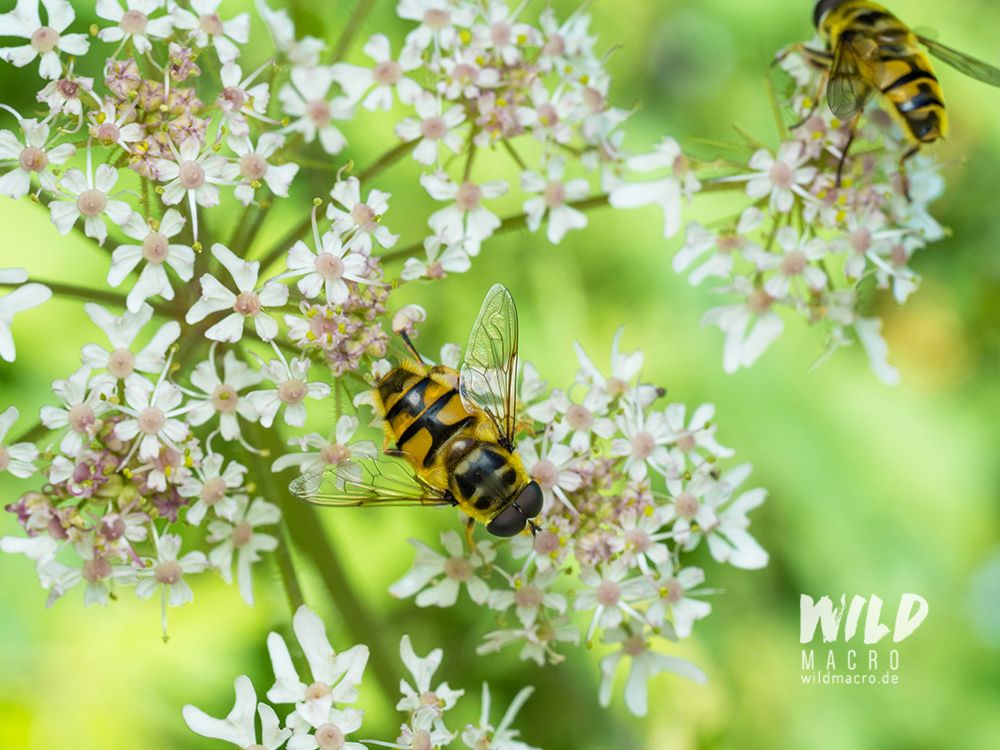
In this way, mixed light scenes can also be realised when, as here, the strong midday sun illuminates the background, but the flowers and hoverflies in the foreground would appear too dark.
The flash brightens the subject, while the background is still brightly exposed even with a low ISO setting - thanks to the unimaginably bright sun.
HOW DO I USE THE FOCUS BRACKETING AND STACKING FUNCTIONS WITH FLASH?
Creating a focus stack, or focus bracket, is as easy as can be - especially when the camera does the work.
It is only important that 1. the subject does not move and 2. the camera is held still.

In no time at all, the camera shifts the focal plane and saves a preset number of images with different focal points for us. Focus points for us.
If we have activated the focus stacking option, the camera then also calculates these directly.
In principle, the bracketing/stacking option "doesn't care" whether a flash is used or not - but it triggers it automatically if it is attached to the camera.
For purely manual creation of a focus bracket, you move the camera slowly towards the subject and take a photo with each small step closer.
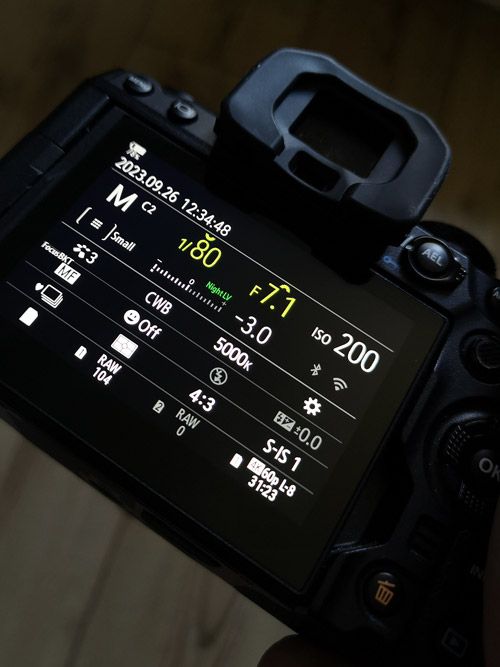
Experience shows that manual settings (M mode) of the camera are most effective here.
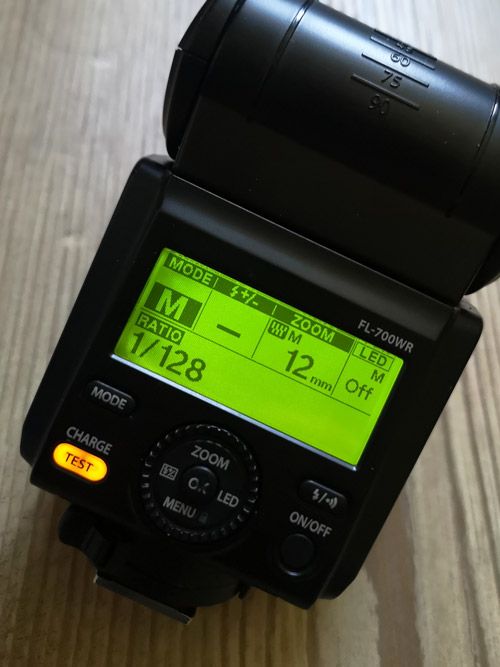
Tip: To ensure consistent exposure throughout the series, it is also best to use the flash in manual mode.
I like to start with the lowest possible flash output (e.g. 1/64), at the widest zoom setting, and then adjust it depending on a first test photo.
Both Focus Bracketing and Focus Stacking offer an option in the settings to determine the loading time between the individual photos in the series.
Here we select a value that on the one hand gives our flash enough time to charge between flashes and on the other hand is short enough to be able to take our complete series as quickly as possible.
I have selected 0.1 as the default setting for my Custom Profile.
The optimal delay time depends on the flash model, the batteries used and the flash power setting.
The less energy the flash needs (low flash output), the faster it can fire again and the shorter we can choose the time delay.
If the flash does not have enough time to recharge between the photos, we will have darker or, in the worst case, even completely black pictures in our series if it has not fired at all due to lack of energy.
Tip: My basic ISO setting is always 200. However, if I notice that I need too much flash power and the flash has problems charging itself between the pictures in my series, I like to increase ISO to 400 and then reduce the flash power accordingly.
WHAT SHOULD A FLASH BE ABLE TO DO FOR FOCUS STACKING?
- High flash output (guide number)
- Fast/short charging time
- High flash frequency at the same flash intensity
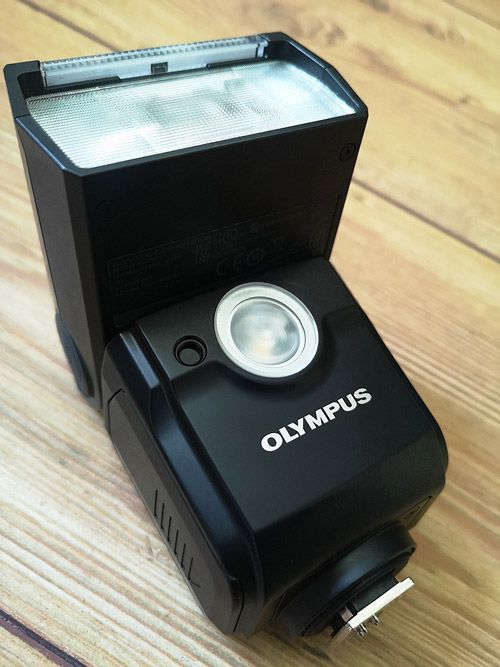
- Optional, but very helpful, is a modeling light directly on the flash

TIPS FOR USING A FLASH:
To ensure a continuous and reliable power supply so that the flash can both fire quickly in succession and provide a consistent exposure, it makes sense to use high-quality batteries.
Special sets with an optimised, continuous voltage output are available for this purpose.
Since we are often very close to our subject in macro photography, we try to get as soft a light as possible.
To fan the flash light directly well, we set the zoom of the flash head to the widest possible setting (wide angle).
The bracketing and stacking functions are really a lot of fun and it is definitely worth trying them out intensively!
Have fun with it.


