Every time I write an article for any of the magazines I collaborate with and whenever I prepare a presentation on underwater photography, each and every time that I’ve written the word "LIGHT", I’ve done it in capital letters.
Photography comes from the Greek words“phos” (light) and “graf” (scratch, write, and draw). So we can translate photography as "painting or drawing with light". When we are doing any type of photographic shot, we don’t consider this premise, because in most cases, without good lighting we will not have a good photo and we are aware of it. Underwater, it takes on a special dimension on the basis that there is a series of phenomena that directly affect the light and its behaviour and, in addition, the water acts as a natural filter of light. I will explain it in a simple way.
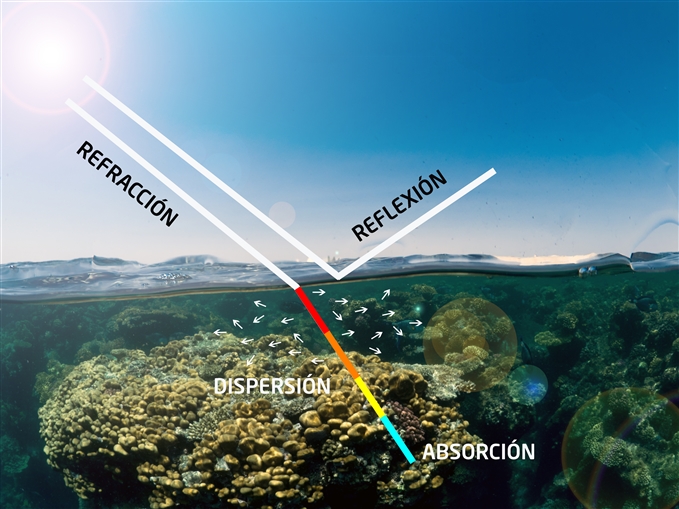
When the sunlight reaches the surface of the water, it enters it and four physical effects occur that directly influence its behaviour and the result that we are going to obtain in our underwater pictures.
Juan José Saéz • OM-D E-M1 Mark II • M.Zuiko Digital ED 8mm 1:1.8 Fisheye Pro • PT-EP14 • PPO-E04 • 2 x UFL-3
REFLECTION - Depending on the position of the sun with respect to the surface of the water there are solar rays that will penetrate it and others that will reflect. Sunrise and sunset are the two times of the day when we have less light for obvious reasons. The sun is lower and the angle of incidence is smaller, so it will reflect more light. The central hours of the day, when the sun is perpendicular to the surface, is the time when we will have the largest amount of natural light under water. The conditions of the surface are also determining, with waves there are more rays that reflect and that don’t penetrate.
REFRACTION - Light refracts or changes direction at the point of contact with the water. This phenomenon is mainly due to the change in the speed of light when it passes from one medium to another; from air to water the different densities make the "cruise" speed to be different. The angle of incidence of the light beam also causes a greater or lesser change of direction. This phenomenon directly affects the perception that we have, both ourselves with our diving masks and also the camera inside a case that has a flat frontal (this doesn’t happen with a spherical frontal in the form of a dome). The objects appear bigger and closer to us. Our lenses will vary their focal and to know exactly the new focal length we must multiply by 1.3. So, for example, a 100mm becomes a 130mm by the effect of refraction. This would be good on land but underwater, as the focal increases, we will have to move away to be able to photograph the same scene. So, we will add a "mass of water" between the camera and the subject which means less light arriving, as well as an increased possibility of particles in suspension.
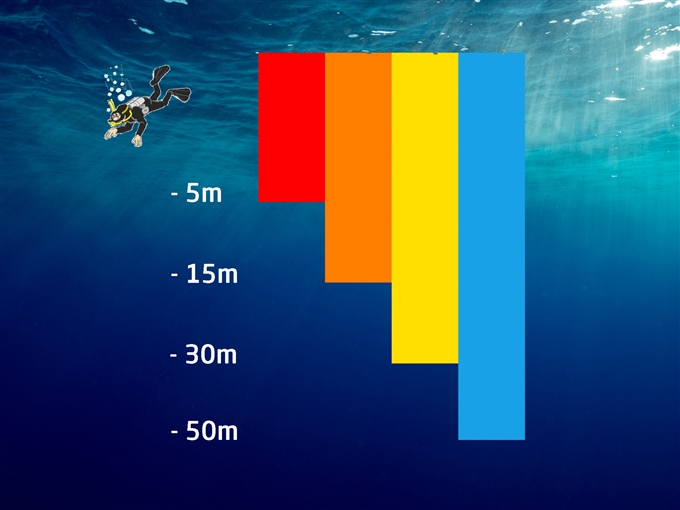
ABSORPTION - Water acts as a natural filter that attenuates colours. The ones with the longest wavelength, those corresponding to the warm spectrum, are the ones that disappear first: reds, oranges and yellows are the first to do so and from a depth of 30 to 35 meters everything begins to have a blue dominant. The construction of the human eye allows us to have more perception of colours underwater, also depending on the angle of incidence of the light. However, if we don’t do the white balance for that depth, the camera sensors will capture the whole scene with the dominant blue mentioned. Nevertheless, currently, most cameras allow the modification of white balance parameters in order to generate a specific one that helps to compensate the wavelengths that are getting lost at different depths.
Juan José Saéz • OM-D E-M1 • M.Zuiko Digital ED 12-40mm 1:2.8 PRO • PT-EP11 • PPO-E04
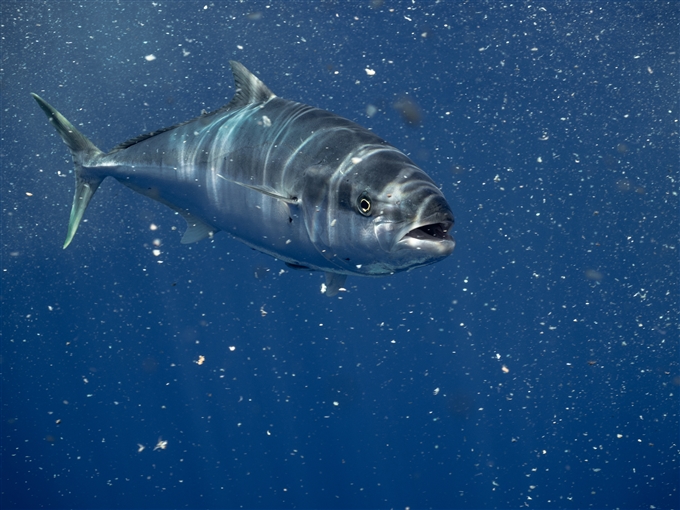
DISPERSION - In the water there are always particles in suspension. In waters where we are going to photograph "big" life there is usually a lot of nutrient in suspension like plankton, krill and other tiny beings. They are the food of the subjects to be photographed but a great inconvenience for underwater photographers. These particles, of any kind, are illuminated by natural light and, of course, by the light of the flashes or bulbs. Each particle that is illuminated is a beam of light that does not pass, that is reflected and therefore a certain amount of light that doesn’t reach its destination. Depending on its quantity and size it can therefore ruin the photo. You can learn how to place flashes and try to illuminate the particles as little as possible. It is a science it itself but what I can say is that if there is a lot of particles in suspension, no matter what we do, they will appear in the photo.
Juan José Saéz • OM-D E-M1 • M.Zuiko Digital ED 12-40mm 1:2.8 PRO • PT-EP11 • PPO-E04
After analysing all these aspects of the behaviour of light and how it affects the photographic capture, it seems clear that for taking quality photos it’s essential to carry lighting systems in our equipment. I always find people in my courses, workshops and professional life who are just starting with underwater photography and who consider flashes or lights accessories that they will buy later to expand their equipment. They are convinced that, if their camera allows it, shooting in RAW is the solution to the lack of chromaticism. They think afterwards in the processing, they will take out the colours that would give them the light they lack, but it is just not like that. It is true that there is a slight gain when taking pictures in RAW format and if it’s a monochromatic picture, it will have a series of colours with more or less intensity but that has nothing to do with what could really be achieved with a correct lighting to start with.
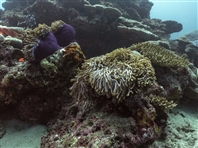
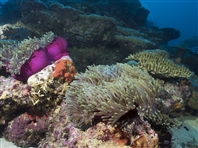
In the colour by colour processing the result would be something more eye-catching but it will have absolutely nothing to do with the same photograph at the same depth and with the same shooting parameters that would have ben taken with a correct lighting.The photographs in this article were taken in the waters of the Maldives at a depth of 19 meters and at the central time of the day where the sun was perpendicular to the surface, so the penetration of natural light into the water was at its maximum, and the surface was calm. For the illuminated photography, continuous lighting was used with 2 LED bulbs of 5,000 lumens each. In the monochromatic photograph, the 2 bulbs were turned off and the ambient light was fired in manual (M) at 1/30, f 9 and ISO 640.
Juan José Saéz • OM-D E-M1 • M.Zuiko Digital ED 12-40mm 1:2.8 PRO • PT-EP11 • PPO-E04
Monochromatic vs. edited RAW vs. illuminated
The one titled "edited" is the same picture but after editing the RAW in Lightroom, and the illuminated one has the same trigger parameters but with the lighting detailed above. It is advisable to pay attention to this photo, because the close-up is perfectly illuminated but it can be observed that in the corals in the back part the light doesn’t quite arrive and for that reason they have the dominant blue. As I mentioned before, water acts as a natural filter and as the distance and depth increase, the intensity of the light decreases and the colours disappear.
Juan José Sáez, Olympus Underwater Visionary
Comments