It’s after your wetsuit has dried and your suitcase has been unpacked that the real work – and sometimes fun – of underwater photography begins: You finally get to look at all those beautiful shots you took and enjoy every “aww”-moment when you discover you’ve managed to capture something (or someone) you weren’t aware of.
And, as any photographer, you will probably start to realize that there are more than enough photos to sort – and to edit. Of course, experience, good gear and most of all the correct lighting (also see our Blogpost “Light is the key”) will totally set the base for high quality underwater pictures, but there is a fair amount of post-production work to be done when you want to get the real outstanding pictures that are not only sharp, but can also convince with a good white balance, the right contrast and vibrant colours. Editing your shots can absolutely enhance their quality. Without going into too much detail about the very many software programs you can use for editing, we want to give you (and especially those of you who are newcomers) a short introduction into what might be useful to think about when you want to edit your underwater shots.
Deleting the “undesirables”
Editing should not and cannot fix bad photos. Hardly ever. Rather never. So, it should go without saying that before even thinking about editing, you should go through your pictures and delete the undesirable ones. As harsh as this may sound and as hard as this might be, getting rid of the photos with poor lighting, mysterious objects or lacking focus can help you to 1. clear storage space, 2. save a lot of time trying to repair photos that you initially knew are not to be fixed, and 3. put all your energy and focus on editing the really good shots.
Cropping the shots
Cropping your pictures can totally change them. Removing the uninteresting parts of your photos can absolutely change the perspective, the focus and the composition. Don’t be afraid to crop your photos multiple times so you get different versions of it. Try out to decentre your main object by applying the well-known rule of thirds: Mentally (or with the help of software) divide your picture into nine boxes by imagining two vertical and two horizontal lines. Then position your main focus at one of the points where the lines meet. This off-centre composition is widely used in any photography as it is said to please the eye. Of course, this is not the ultimate solution for every underwater picture but there is no harm in trying! As long as you have saved the original, there is nothing to lose. The more you practice, the more you will know what to crop and where to stop.
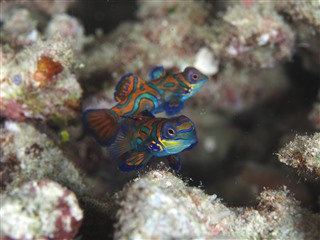
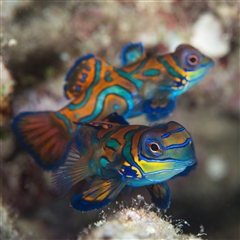
David Benz • E-M1 Mark II • M.Zuiko Digital ED 8mm 1:1.8 Fisheye PRO
• PT-EP14 • PPO-EP02
Reducing the noise
Most editing programs will offer some tools or even add-on plugins to reduce the noise in your photos – and this should be one of the first steps when editing your underwater pictures. While you might be amazed by the quality of your images when looking at them on the camera screen and you might also think you’ve done an amazing job when you finally open the pictures on your computer, you will often find some small dots all over the photo when zooming in, especially with underwater photos as they are taken in difficult conditions. While there are certain options to help you prevent the noise as much as possible during the dive (especially by setting the ISO correctly), there are ways to reduce noise during the post-production and you should make use of them. So, play around with tools like noise-reduction filters and the such until your picture is smooth and ready for further editing.
Balancing the colours
Underwater, colours can be tricky and sometimes, everything just seems grey or blue and mostly very cold. If you find yourself frustrated with such a case, use the various options and filters for balancing the colours and improving the white balance in your pictures. Make different trials and see what works best. By balancing the colours and whites of your shots, you can make them look more warm or cold, depending on the original and your goal, as well as enhance a certain focus object of a certain colour (for example a bright orange clown fish). Moreover, the additional possibility of graduated filter tools usually allows you to both make some parts warmer or brighter and other parts darker or colder. So, look out for colour balance filters, graduated filter and white balance options in your software.
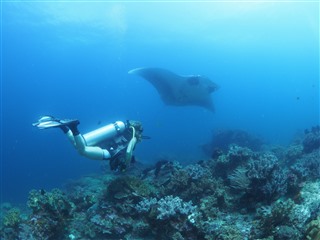
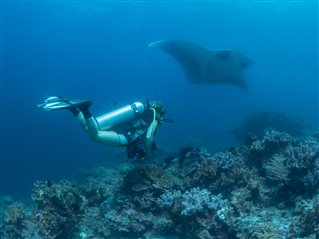
David Benz • E-M1 Mark II • M.Zuiko Digital ED 8mm 1:1.8 Fisheye PRO
• PT-EP14 • PPO-EP02
Increasing contrast & saturation
One of the most important things you can do with your underwater pictures is to edit the contrast. Every underwater photographer faces the problem that water can really suck the contrast out of a photograph. This is especially sad when you have managed to capture the most extraordinary colours. Nearly every editing tool offers you a possibility to easily improve the contrast. Play around with different levels of contrast and see the magic happen. The same applies for saturation. It is possible to enhance the saturation for a whole picture or you can increase the saturation for certain colour ranges such as reds, greens and blues individually. Only when you get your contrast and saturation sorted, you will be able to think back of all the wonderful colours you saw underwater.
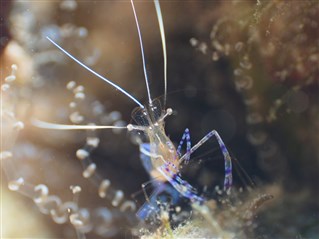
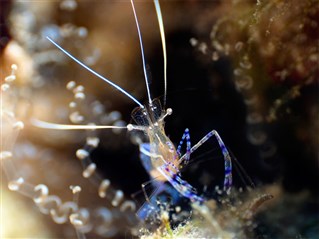
Gemma Rull • E-M1 • M.Zuiko Digital ED 60mm 1:2.8 Macro • PT-EP11
• PPO-EP02 • 2 x UFL-3
Apply finishing touches
Don’t forget to finally adjust the overall brightness of your pictures. Moreover, you should finally – or in between the other steps – use the option to fix some weird parts with tools like the clone stamp and the such. In the water, there are always particles in suspension which will appear in the photo. So, make use of the opportunity to erase certain little spots or even a small disturbing background. Did you see the diver ?
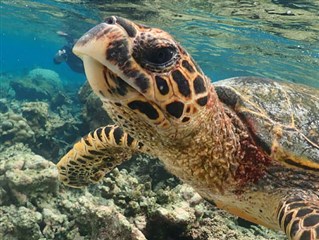
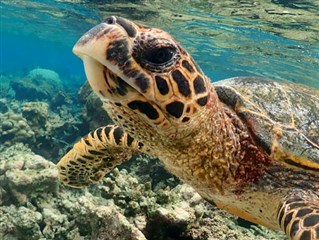
Gemma Rull • TG-5 • PT-058 • PTWC-01 wide conversion lens • 2 x UFL-3
This list of possible editing options could go on forever. To be honest, there are as many options to edit underwater photos as there are for normal photographs – and this is a huge number of options. It is certain that underwater photographs need a little special treatment when it comes to post-production which can cost time and energy. No matter how good you are and no many how expensive your gear is, there is always a chance of poor lighting or other disturbances underwater that other photographers don’t have to face. So, editing can help you to improve your wonderful shots and to create memories to last a lifetime.
So, it is definitely worth getting into editing and being able to at least set some basics adjustments. Still, always keep in mind not to overdo it because – as always – less can be more!
Comments
Show more comments (1)